How to Integrate Invoice Software with Your Accounting System
Step-by-step guide to integrating invoice software with your accounting system. Connect QuickBooks, Xero, and more to eliminate manual data entry and reduce errors.
Your accounting system holds your financial truth. Different accounting platforms handle automation and integration differently, yet every transaction, vendor payment, and GL code ultimately lives there. But when invoice data sits in a separate tool, someone must manually bridge that gap, creating data entry errors, processing delays, and reconciliation headaches.
Integration eliminates duplicate data entry while maintaining your books as the authoritative source. This guide covers the practical steps to connect these systems and common mistakes to avoid.
Why Integration Matters
Finance teams often choose invoice software based on extraction accuracy or processing speed. Those capabilities matter, but they deliver limited value if extracted data still requires manual entry into your accounting system.
Consider a typical scenario. Your invoice tool captures vendor name, invoice number, amount, and line items from an email attachment with 95% accuracy. An AP clerk reviews it, then manually types everything into QuickBooks - creating bills, selecting vendors, entering line items, assigning GL codes. That step consumes 3-5 minutes per invoice and introduces new errors the original extraction avoided.
Integration removes manual entry entirely. The invoice tool creates bills in QuickBooks directly using extracted data. Your AP clerk reviews the created bill rather than entering data. Processing time drops from 5 minutes to 30 seconds per invoice, and error rates fall below 1%.
A business processing 500 invoices monthly saves 37.5 hours through integration - nearly one full-time employee freed for higher-value work. Organizations navigating the broader decision about which tools work best together can examine the specific capabilities that different platforms offer for automated data exchange.
Understanding Your Integration Options
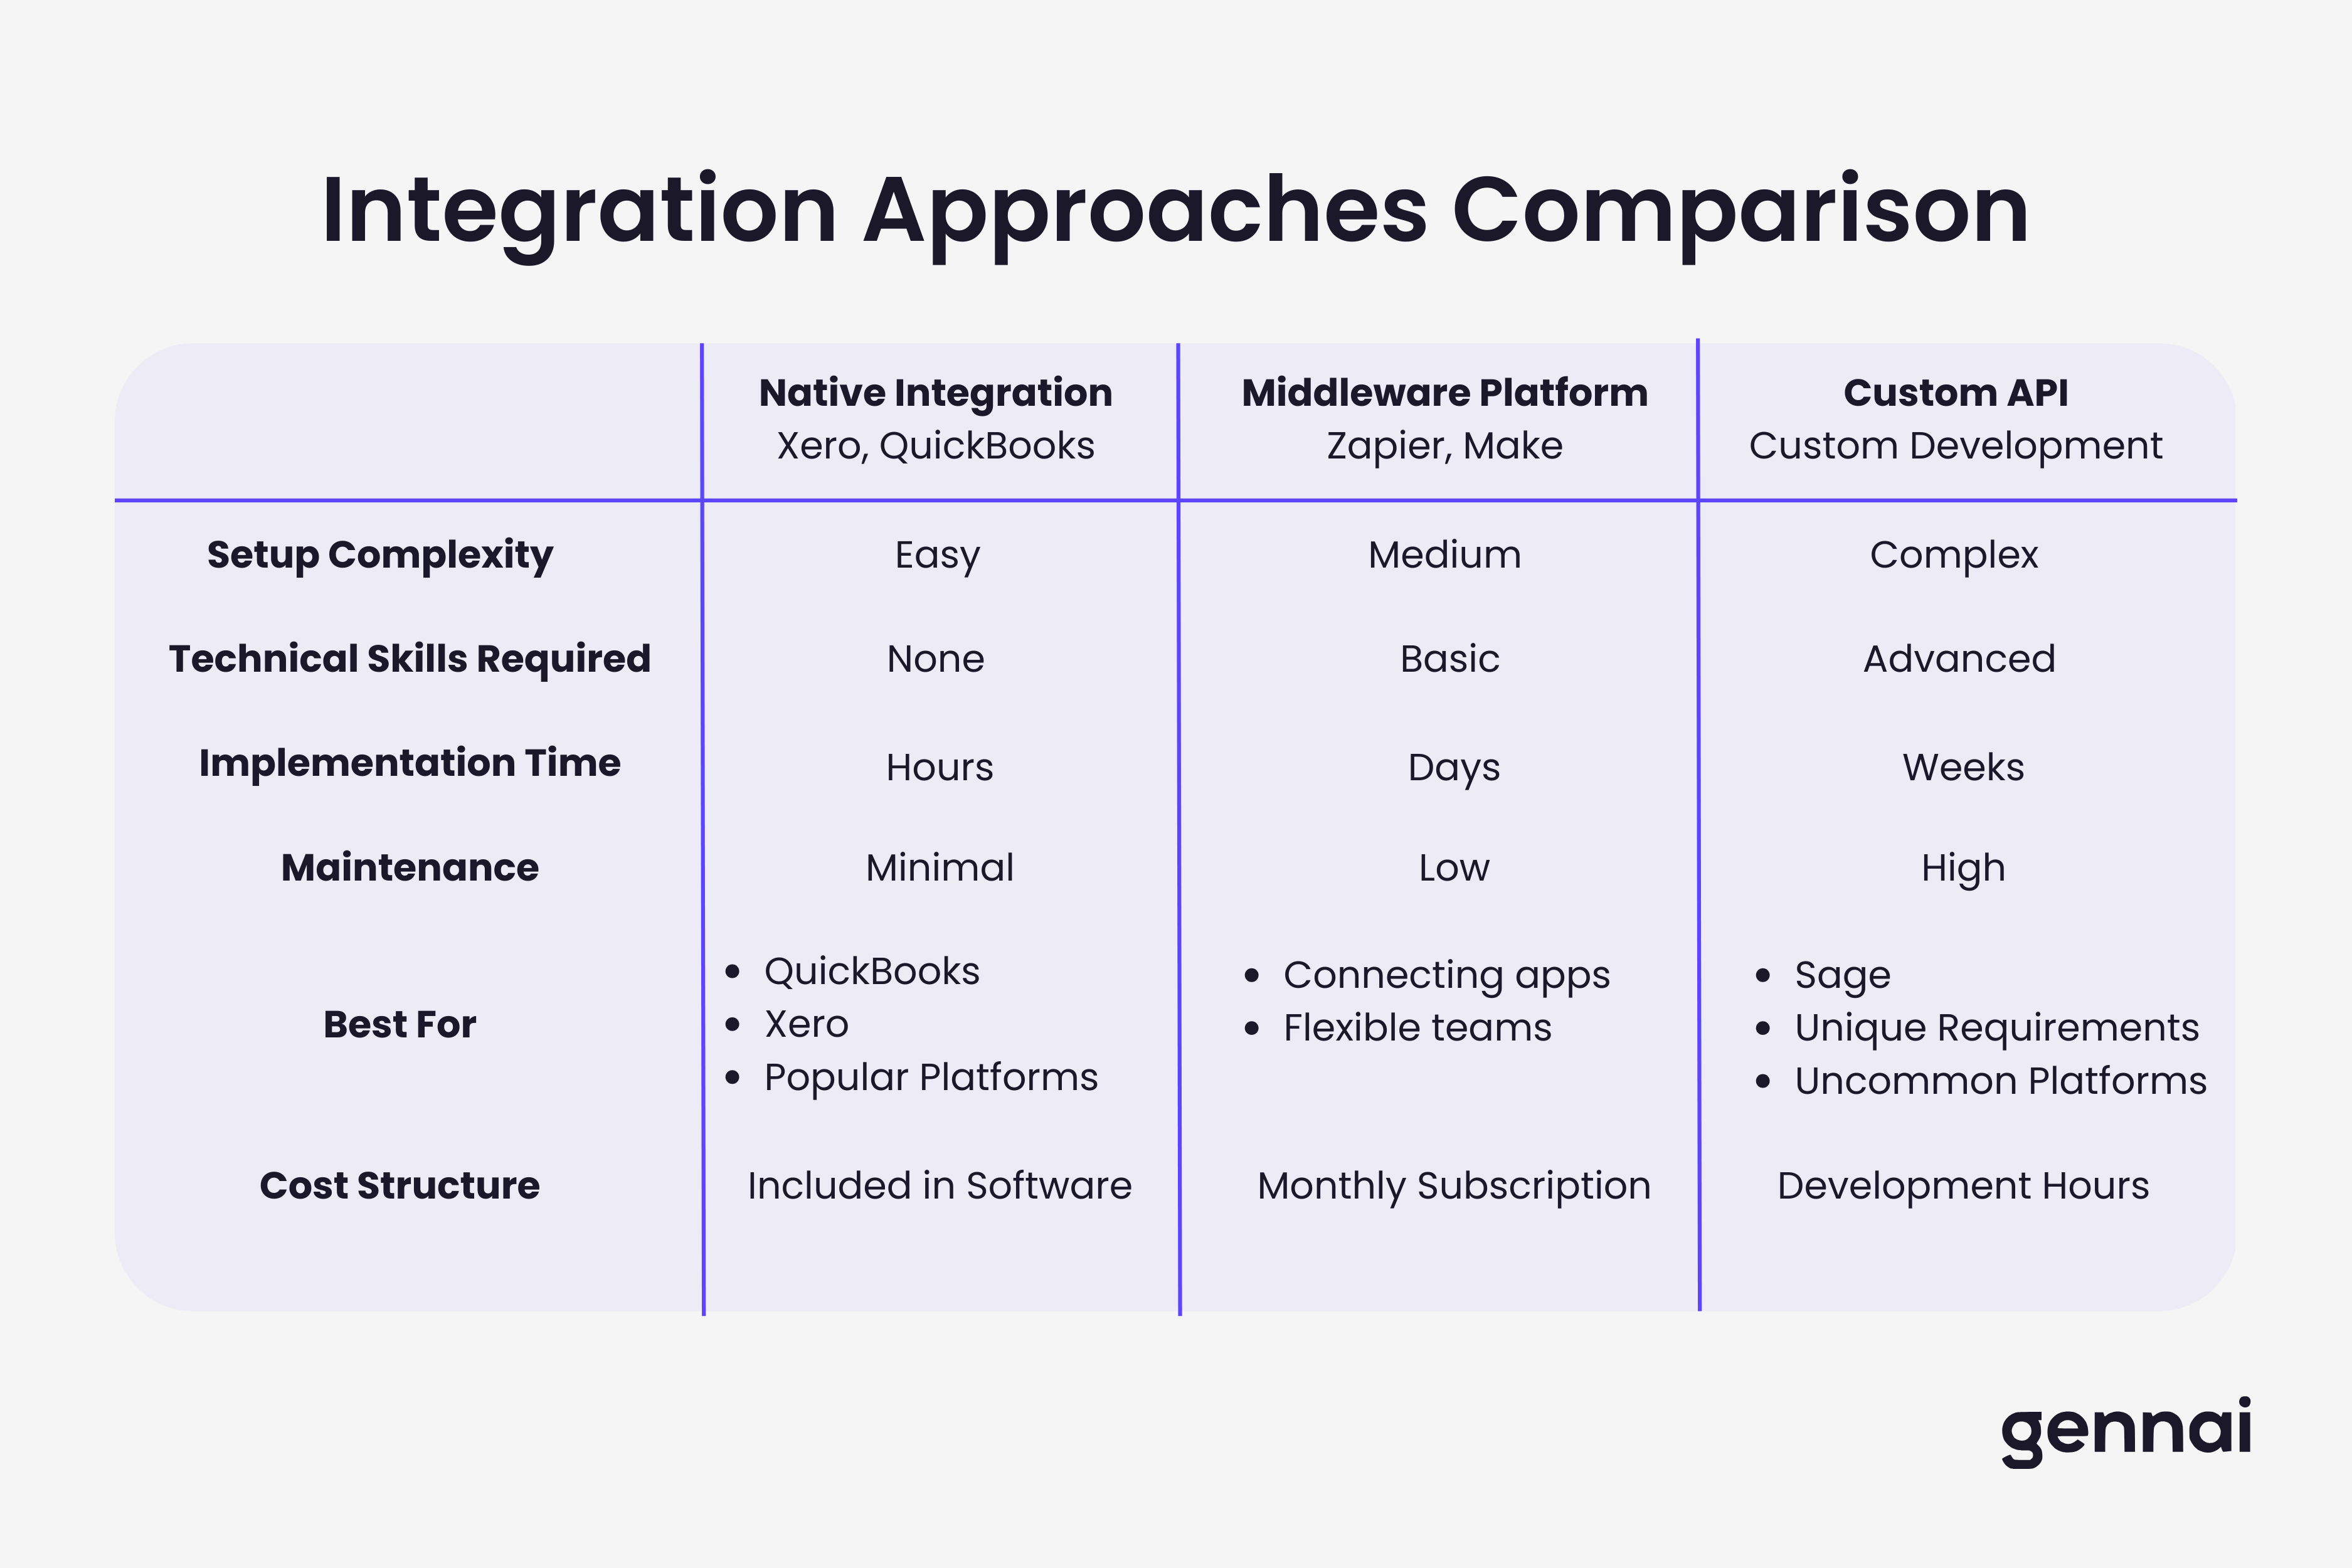
Three integration approaches serve different business needs and technical capabilities.
Native Direct Integration connects invoice software directly to accounting platforms using official APIs. Tools like Gennai offer native integrations with QuickBooks Online and Xero. You authorize the connection through OAuth, and systems sync automatically. Native integrations work best for popular accounting platforms. The vendor handles API changes and maintenance.
Middleware Platforms like Zapier and Make act as middleware, providing pre-built connectors and visual workflow builders. A workflow triggers when invoices are extracted, creates bills in your accounting platform, and posts notifications. Middleware excels at connecting applications without direct integrations. The tradeoff: added latency and dependence on the middleware service.
Custom API Integration provides maximum flexibility but requires development resources. This makes sense for unique requirements that pre-built integrations can't address. Custom integration requires ongoing maintenance when APIs change.
The decision usually comes down to your accounting platform and resources. If your accounting software offers native integration, start there.
Step-by-Step Integration Setup
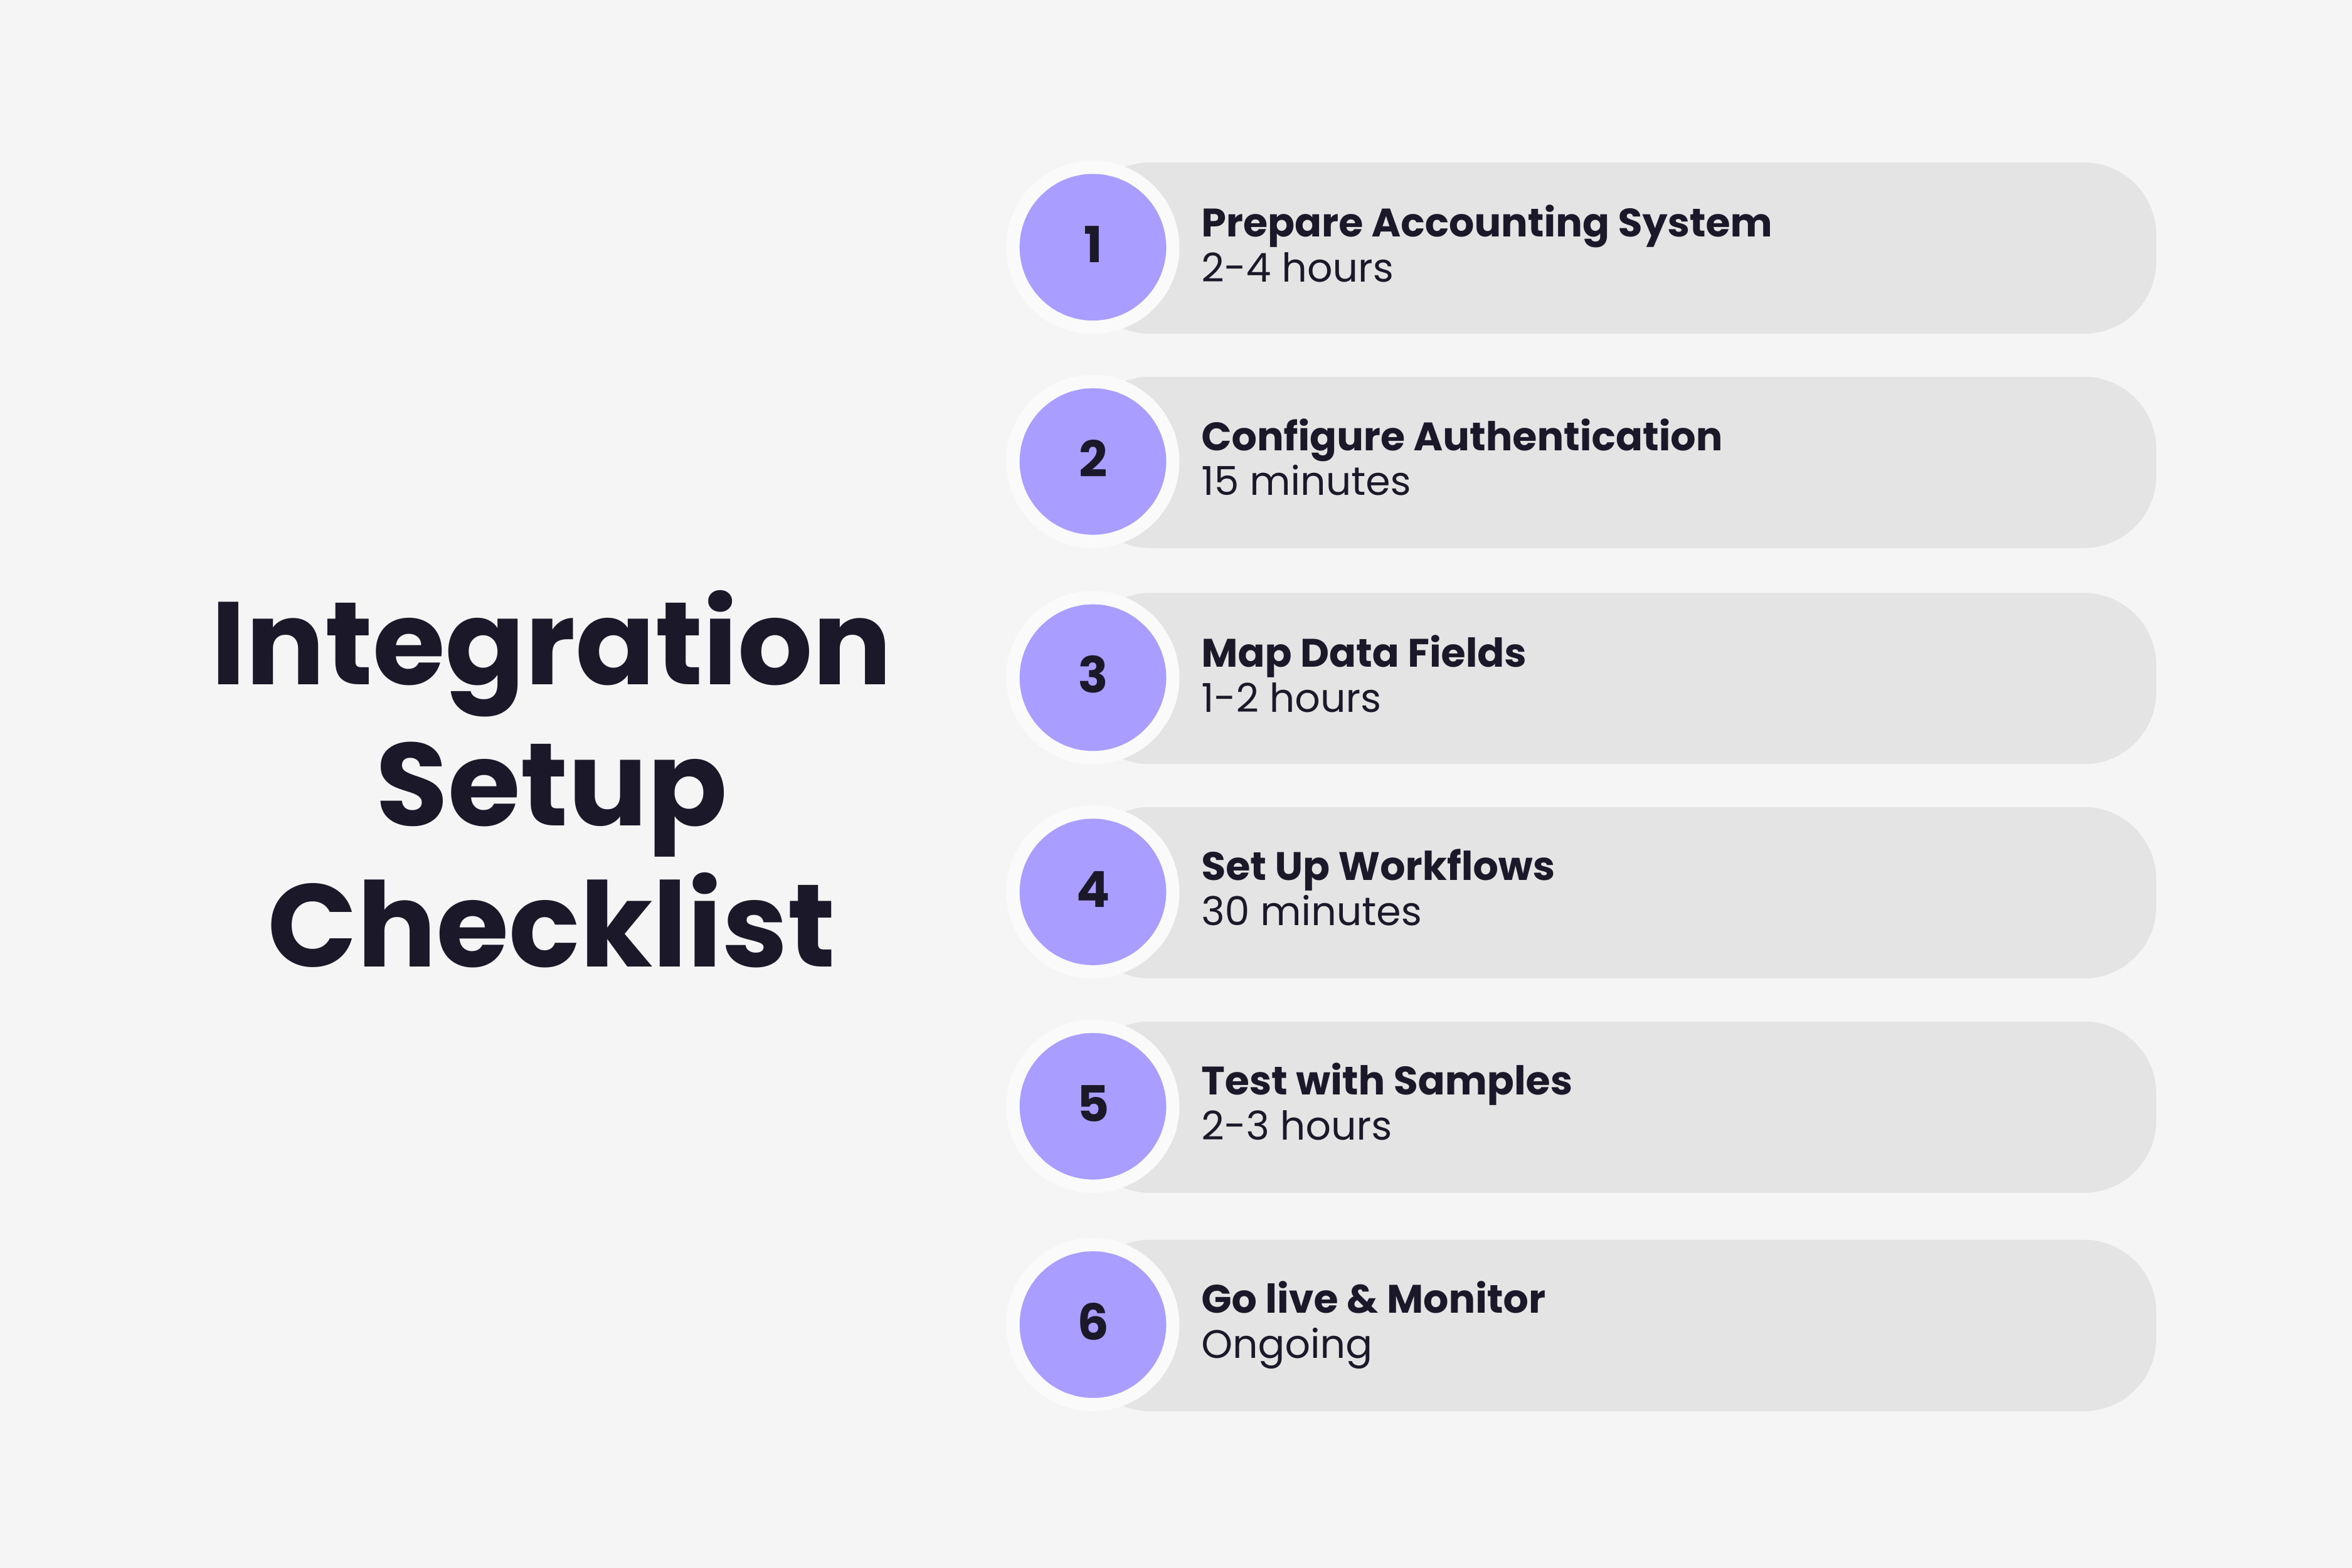
Step 1: Prepare Your Accounting System
Clean vendor master data by consolidating duplicates and standardizing naming conventions. Audit your chart of accounts and document default GL codes for common expenses. Create a testing environment if available (QuickBooks sandbox or Xero practice organization).
Step 2: Configure Authentication
Use OAuth 2.0 for secure connection. In your invoice tool, click "Connect Accounting Software," sign in to your accounting platform, and grant required permissions (vendor access, bill creation). Systems exchange secure tokens without sharing passwords.
Step 3: Map Data Fields
Configure vendor matching with fuzzy rules to handle name variations. Set up default GL codes based on vendor types or line item keywords. Decide whether unmatched vendors create automatically or flag for manual review.
Step 4: Set Approval Workflows
Create draft bills for manual review, or configure automatic approval based on amount thresholds (under $500 auto-approve, $500-$5,000 requires manager, over $5,000 needs CFO).
Step 5: Test Thoroughly
Process simple invoices from established vendors first. Test edge cases like new vendors, multi-page invoices, and unusual formats. Verify vendor matching, GL codes, and approval routing work correctly.
Step 6: Go Live and Monitor
Launch during low-volume periods. Set up error notifications and track success rates, sync times, and accuracy metrics during the first month to establish optimization baselines.
Common Integration Challenges
Vendor Matching Failures: Invoice vendor names don't match accounting records. Implement name normalization (strip Inc., LLC, Corp.), use fuzzy matching with 90%+ thresholds, and maintain a vendor alias table.
GL Code Errors: Start conservative, assigning codes automatically only where confident. Use keyword-based coding for line descriptions and vendor-level defaults as fallbacks.
Duplicate Bills: Check invoice number, vendor, amount, and date before creating bills. Flag potential duplicates for review.
Sync Timing: Implement batch processing during off-peak hours. Configure retry logic for failed syncs.
Optimizing and Measuring Success
Exception-Based Review: Focus review effort on invoices that need human judgment. Flag new vendors, amounts exceeding thresholds, or low-confidence GL codes for review. Let routine invoices from established vendors flow through automatically.
Key Metrics to Track:
- Touchless processing rate (target: 75-85% for established vendors)
- Time from extraction to bill creation (target: under 5 minutes)
- Data entry error rate (target: under 1% vs 2-3% manual)
- Days to process end-to-end (target: 1-2 days vs 5-10 days manual)
- Cost per invoice (target: 40-60% reduction)
Next Steps
Integration between invoice software and accounting systems transforms AP operations from manual data entry to automated processing. Start by choosing the integration approach that matches your accounting platform. Native integration offers the simplest path for QuickBooks, Xero, or other platforms with pre-built connectors.
Follow the systematic implementation process: prepare your accounting data, configure authentication, map data fields, set up approval workflows, test thoroughly, and monitor during initial rollout.
Expect challenges during implementation. Vendor matching failures, GL coding errors, and sync timing issues affect most integration projects. Modern invoice extraction platforms handle the technical complexity of accounting integration, so plan time for troubleshooting during the first month.
Measure results to justify the investment. Track processing time, accuracy rates, and cost per invoice to demonstrate value and guide improvement.
Modern invoice extraction platforms provide pre-built connectors and intuitive configuration that work without IT expertise. The barrier to integration has dropped dramatically, making automated invoice-to-accounting workflows accessible to businesses of all sizes.
Ready to connect your invoice processing to your accounting system? Modern platforms sync extracted invoice data to QuickBooks and Xero automatically, eliminating manual data entry while maintaining clean financial records.
Ready to automate your invoices?
Start extracting invoices from your email automatically with Gennai. Free plan available, no credit card required.
Start FreeRelated Articles
Accounts Payable vs Accounts Receivable: A Business Owner's Plain-English Guide
Accounts payable vs accounts receivable, explained in plain English: what each one means, how they shape your cash flow, and why the difference matters.
GuideInvoice vs receipt: which one your accountant actually wants
Invoice vs receipt explained: the invoice records the expense and supports a VAT or GST reclaim, the receipt only proves you paid. Here is which one to keep.
GuideWhat to do when a supplier sends the wrong invoice
A supplier sent the wrong invoice? Here is what to do: identify the error, ask for a corrected invoice or credit note, and hold payment until it is right.